Fitting out the steam locomotive!
 ...
... ...
...
Click on each picture for a closer look!
.
This past weekend, Dave, Arno and Michael G. split their time between the roundhouse work (partly reported in the prior news item) and the shop where we are assembling the steam locomotive.
.
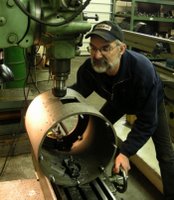
In the left hand photo above, we find Michael G. running an Induma vertical milling machine to put a rectangular hole in the bottom of the Sweet Creek smokebox to clear the steam and exhaust pipes. This was one of the few instances where the holes provided by the vendor were too small and in the wrong place.
.
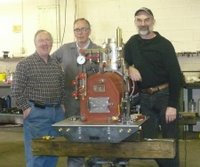
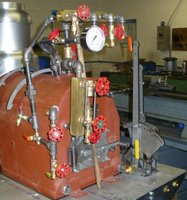
At the shop, the team had a great time sorting out pipe fittings and dry fitting them to the boiler to find out where everything went and whether 'this' elbow needed a nipple 'that long' and if it went over 'there' with 'this' union and a valve. By the end of the weekend they were almost out of plastic bags of fittings and the steam engine looked more complete than ever. In the picture in the middle above, we find the team admiring the assembled locomotive. In the right hand picture we get a close up view of the backhead where most of the fittings are applied.
.
This past weekend, we were also able to pressurize the boiler to 90 psi with shop air to check for leaks (we found none), run the chassis briefly and blow the whistle for the first time. The whistle has a nice three note chime. The whistle has a more full and rounded tone than is apparent in the video below. Click on the arrow in the video below to listen to the whistle!
.
Story and Photos by Michael Guy; Video by Dave Wetherald
.
.
This past weekend, Dave, Arno and Michael G. split their time between the roundhouse work (partly reported in the prior news item) and the shop where we are assembling the steam locomotive.
.
In the left hand photo above, we find Michael G. running an Induma vertical milling machine to put a rectangular hole in the bottom of the Sweet Creek smokebox to clear the steam and exhaust pipes. This was one of the few instances where the holes provided by the vendor were too small and in the wrong place.
.
At the shop, the team had a great time sorting out pipe fittings and dry fitting them to the boiler to find out where everything went and whether 'this' elbow needed a nipple 'that long' and if it went over 'there' with 'this' union and a valve. By the end of the weekend they were almost out of plastic bags of fittings and the steam engine looked more complete than ever. In the picture in the middle above, we find the team admiring the assembled locomotive. In the right hand picture we get a close up view of the backhead where most of the fittings are applied.
.
This past weekend, we were also able to pressurize the boiler to 90 psi with shop air to check for leaks (we found none), run the chassis briefly and blow the whistle for the first time. The whistle has a nice three note chime. The whistle has a more full and rounded tone than is apparent in the video below. Click on the arrow in the video below to listen to the whistle!
.
Story and Photos by Michael Guy; Video by Dave Wetherald
.


<< Home